

Create a purchase order
A purchase order puts in writing what material you ordered, from which supplier, and for how much. In Matterial it lives in Purchasing and is the foundation for tracking deliveries and payments, and for making that spend show up in your project budget. Creating one takes less than a minute: the only required field is the material, and you fill in the rest with whatever you have on hand.
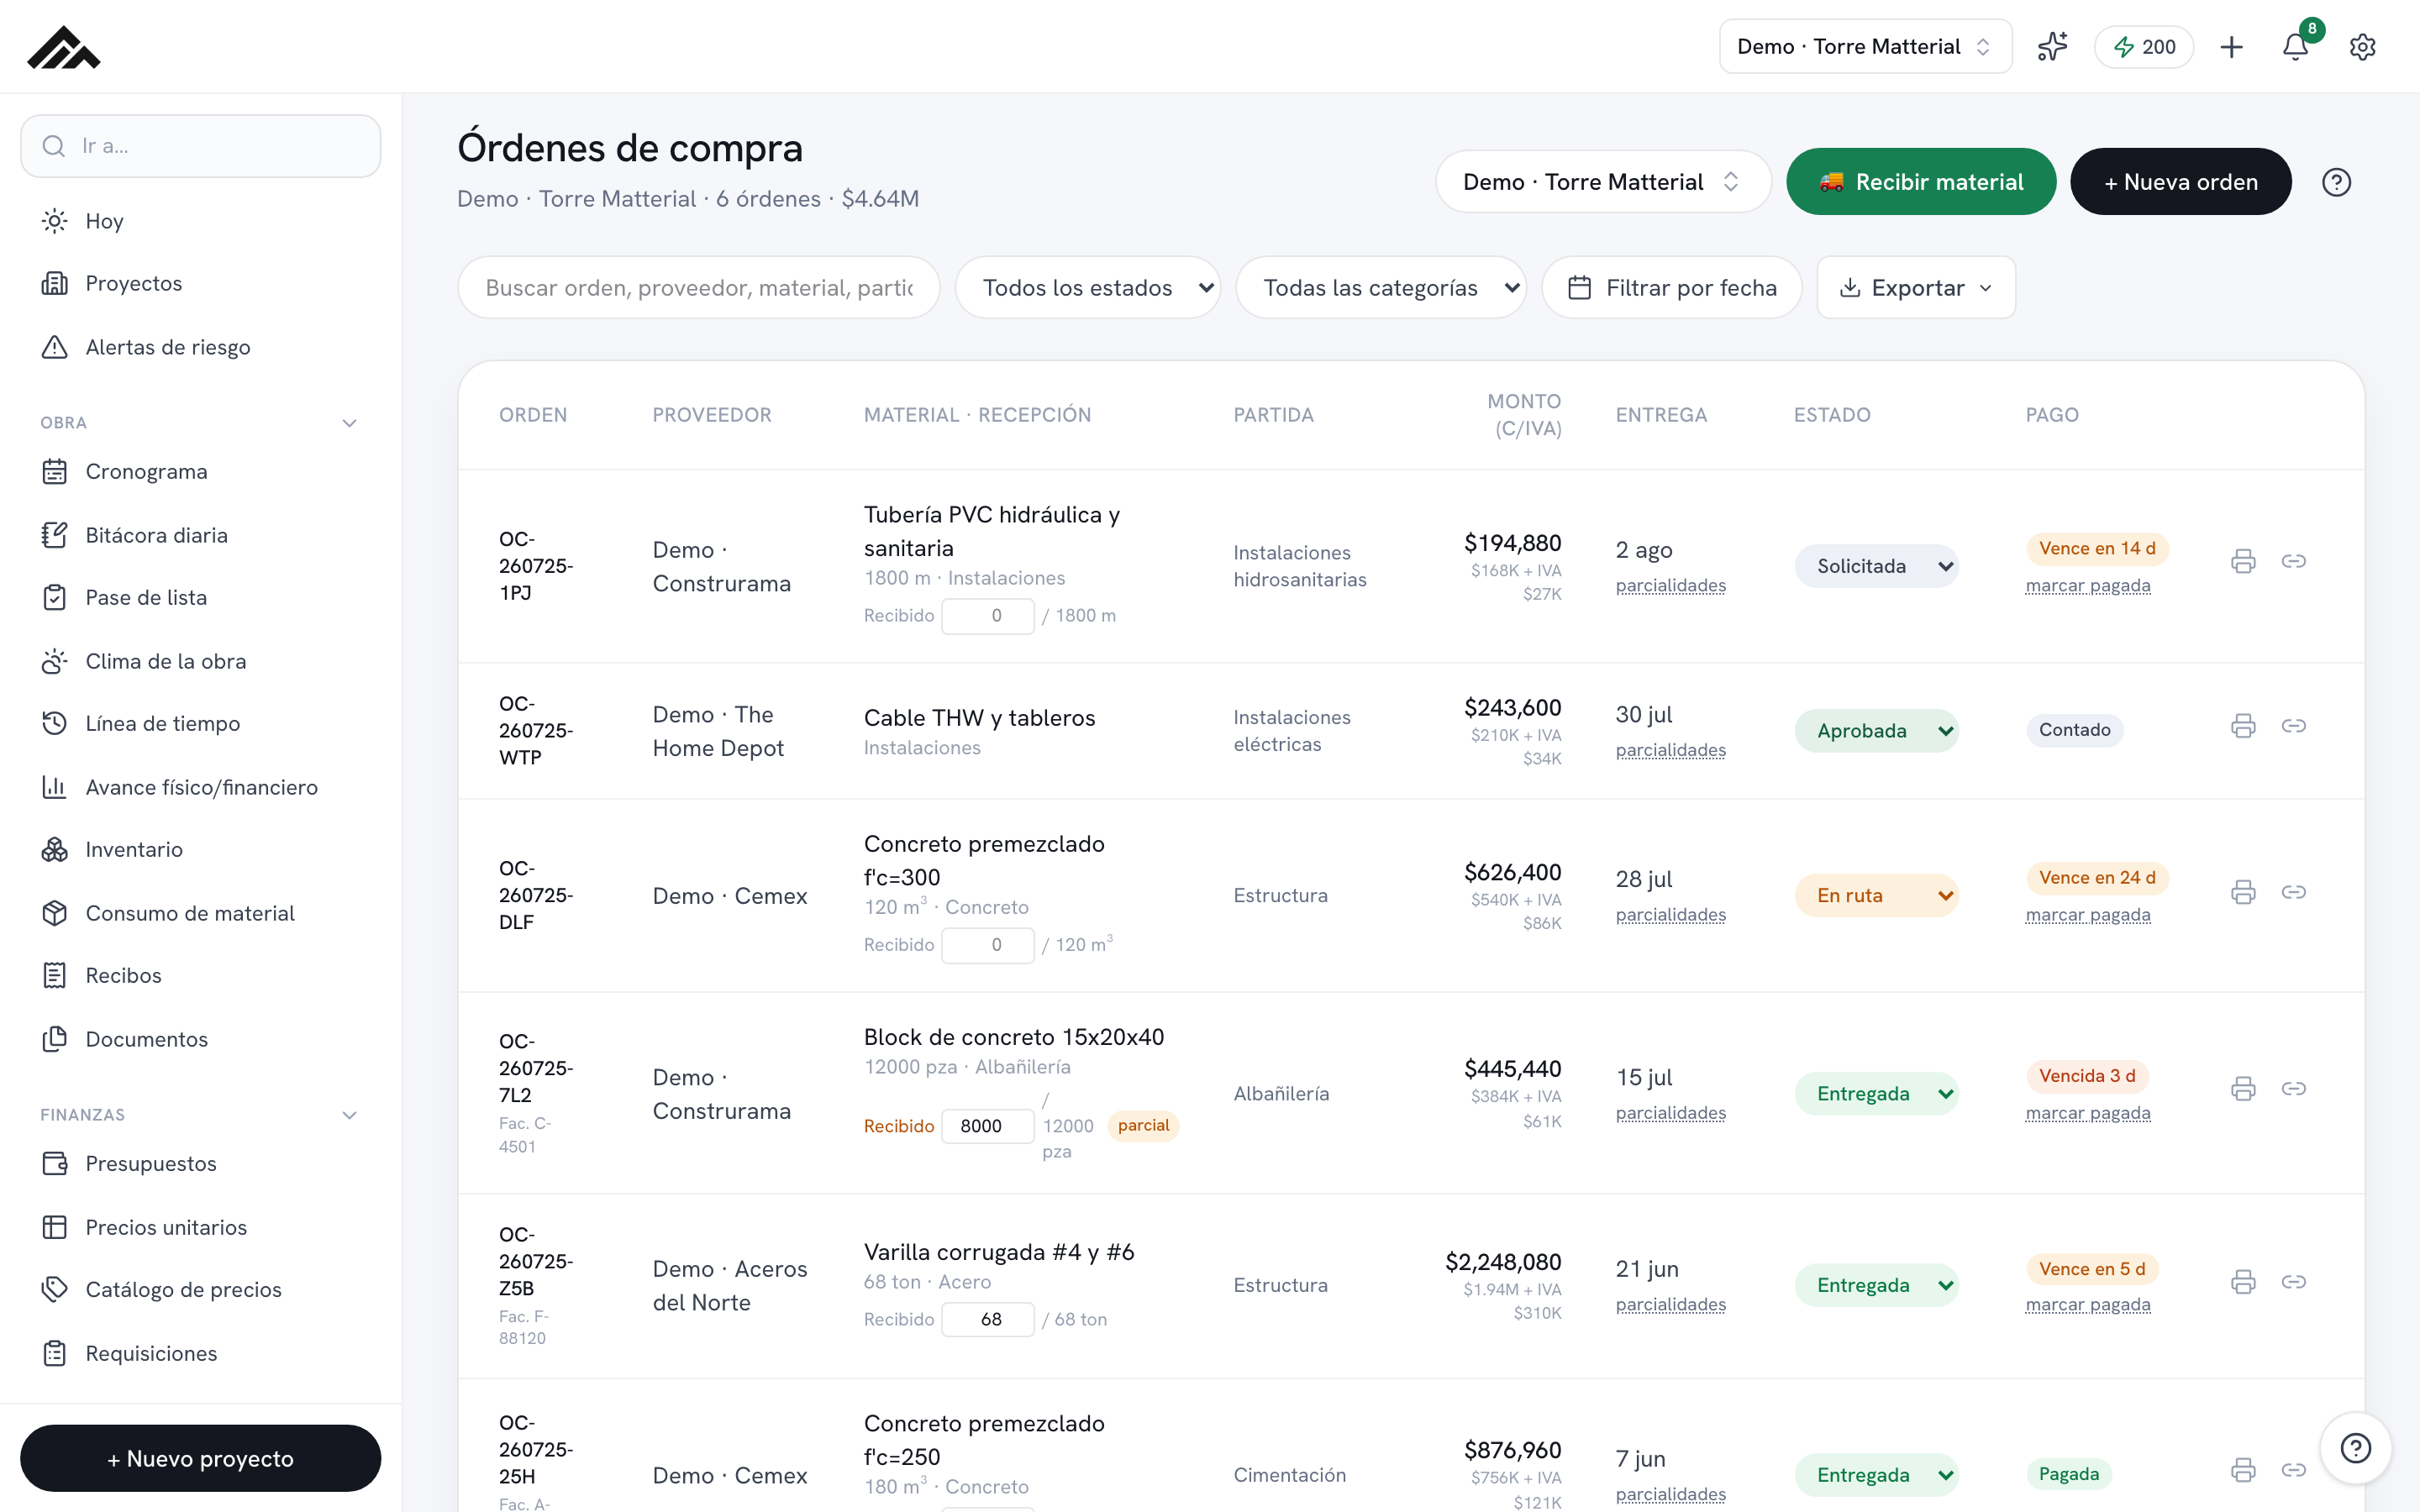
- It lives in Purchasing and works project by project: pick the job in the selector up top before you start.
- The only required field is Material / item; supplier, budget line, VAT, and credit are optional if you have them.
- Choosing a supplier pre-fills their credit days, and the VAT rate (16% / 8% / 0%) works out the total for you.
- Linking a budget line makes the order count toward your actual spend once you mark it Delivered.
- It doesn't use Matterial Credits: this feature works without AI.
- 1
Open Purchasing and pick the project
Go to Purchasing (/compras). Up top, in the project selector, choose the job the purchase belongs to. Then click the dark "+ New order" button (or tap the quick-action button on mobile) to open the "New purchase order" panel.
- 2
Type the material or item
In "Material / item," describe what you're ordering, for example "Gray cement CPC 30R." This is the only required field: until you fill it in, the button to create the order stays disabled.
- 3
Choose a supplier and budget line (optional)
Under "Supplier," pick from your list; selecting one pre-fills their credit days if you hadn't entered them yet. Under "Budget line," link the order to a line so the spend counts against your budget: as committed while it's in progress, and as actual spend once you mark it Delivered.
- 4
Enter quantity, amount, and VAT
Fill in "Quantity" and unit, the "Subtotal before VAT (MXN)," and the "Purchase VAT" (16% standard, 8% border, or 0% exempt). You can also add the "Invoice number (CFDI)," the "Estimated delivery," the "Credit days," and the "Category." Below, you'll see the summary with Subtotal, VAT, and Total worked out automatically.
- 5
Create the order
Click "Create order." The panel closes and the order shows up in the list with its folio number, both in the table (desktop) and as cards (mobile).
- 6
Track status, receipt, and payment
From the list, change the status (Requested, Approved, In transit, Delivered…), log what's received as the material arrives or use "Receive material," and record payment with "mark as paid." For deliveries or payments in parts, open "Partials." You can also download the order PDF with your branding, or copy the link so the supplier can confirm the delivery date.
Frequently asked questions
Can I create an order without a supplier or a price?
Yes. The only required field is Material / item. You can leave the supplier, subtotal, and the other fields blank and fill them in later by editing the order.
How do I make the order count toward my budget?
Link a budget line when you create the order. While it's in progress (Requested, Approved, or In transit) it counts as committed, and once you mark it Delivered it adds to that line's actual spend.
What if the material arrives in several deliveries or I pay in installments?
Open "Partials" on the order to log deliveries and payments in parts. Once the deliveries cover the quantity ordered or the payments cover the total, the order is marked Delivered or Paid automatically.